NTE Boss Bestiary: Main, World, Pilgrimage & Hidden Bosses — Weaknesses & Strategies
The Neverness to Everness (NTE) bestiary of the main bosses — locations, elemental weaknesses, attack mechanics, recommended teams, and reward drops for the main-story, world, Pilgrimage, and hidden bosses, plus notes on newer bosses added in later versions.
Published: 2026/05/24 · Updated: 2026/11/07
Quick answer: NTE’s main bosses are 7 main-story, 7 world, 3 Pilgrimage (4 from 1.5), and 2 hidden, plus Tomato Devil and High-Risk / event exclusives. The key to fighting bosses is “weakness element + adjacent elements on the cycle” (to trigger resonance reactions like Blossom / Hexed / Discord). Nine bosses give an S-rank Arc on first clear (Serenetti → Camellia Society, Swallowtail → Reality Shelter, Black Tome → Youthful Fantasy, Headless Rider → Raging Flames, Nestbound Bird → Tears Behind the Mask, Beat King → Blow Up the Crowd, Sea Prisoner → Song of the Whale, Morphix → Good Doggo Goes Far, Arachne → Eternal Waltz). The hidden boss Hethereau Guardian rewards a Solid-type S-rank Arc that only Solid characters can use well.
NTE’s boss design follows a dual axis of “action parrying + elemental reactions,” and every boss has a clear elemental weakness plus a specific way to counter its moves. This article covers the main bosses, with newer additions listed near the end.
Boss Overview
| Category | Count | Re-fight Mechanic | Main Rewards |
|---|---|---|---|
| Main-Story Bosses | 7 | Story version fought once; most can be re-fought elsewhere (see each boss) | Advances the main story |
| World Bosses (Anomaly Hunt) | 7 | Fast-travel after first clear, unlimited re-fights | First-clear S-rank Arc, character upgrade materials, Scarab Coins, Arcane Thread |
| Pilgrimage Bosses (Weekly) | 3 now (4 from 1.5) | Reset Mondays at 05:00, 3 claims per week | Esper Ability upgrade materials |
| Hidden Bosses | 2 | Condition-triggered | S-rank Arcs, Fons currency |
⭐ Boss Elemental Weakness Quick Reference
| Boss (Chinese) | English | Weakness | Type |
|---|---|---|---|
| 畫框怪 | Picture Frame | Anima | Main Story |
| 塔吉多 | Taygedo | Lakshana | Main Story |
| Film-MANISH | Film-MANISH | Cosmos | Main Story |
| 想麵糰 | Imaginadough | Chaos | Main Story |
| 永不謝幕的阿拉克涅 | Never-Ending Arachne | Chaos | Main Story + Weekly |
| 討債人 | Debt Collector | Cosmos | Main Story + Weekly |
| 殘虹 | Zankou | Incantation | Main Story |
| 賽潤尼緹 | Serenetti | Incantation | World |
| 燕尾蝶 | Swallowtail | Anima | World |
| 黑色魔典 | Black Tome | Chaos | World |
| 無首鐵馭 | Headless Rider | Psyche | World |
| 節奏大師 | Beat King | Psyche | World |
| 海之囚徒 | Sea Prisoner | Anima | World |
| 巢縛之鳥 | Nestbound Bird | Cosmos | World |
| 番茄惡魔 | Tomato Devil | Chaos | Side Quest |
| 墨菲克斯 | Morphix | Cosmos | Weekly |
| 瑪門 | Mammon | Lakshana | Hidden |
| 審判執刑者 | Justice Executioner | Psyche | Hidden |
Characters for Each Weakness
Characters released since launch can also hit these weaknesses (check each character’s page for their element):
- Cosmos: Hotori, Shinku, Elyms (from 1.5, 11/11), Esper Zero
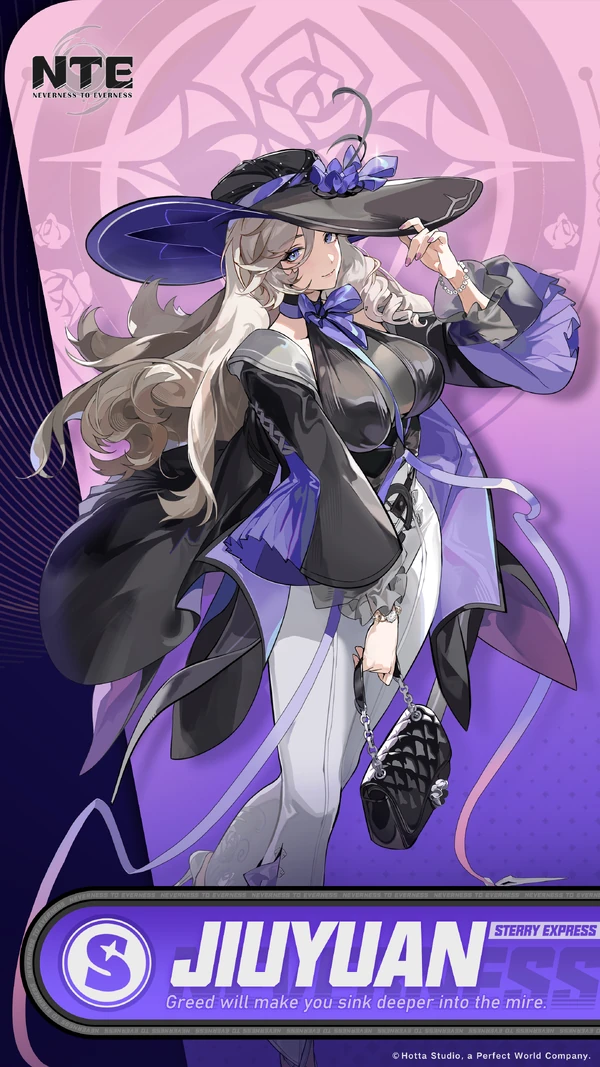
- Anima: Linko, Iroi, Jiuyuan, Nanally
- Incantation: Zankou, Baicang, Sakiri
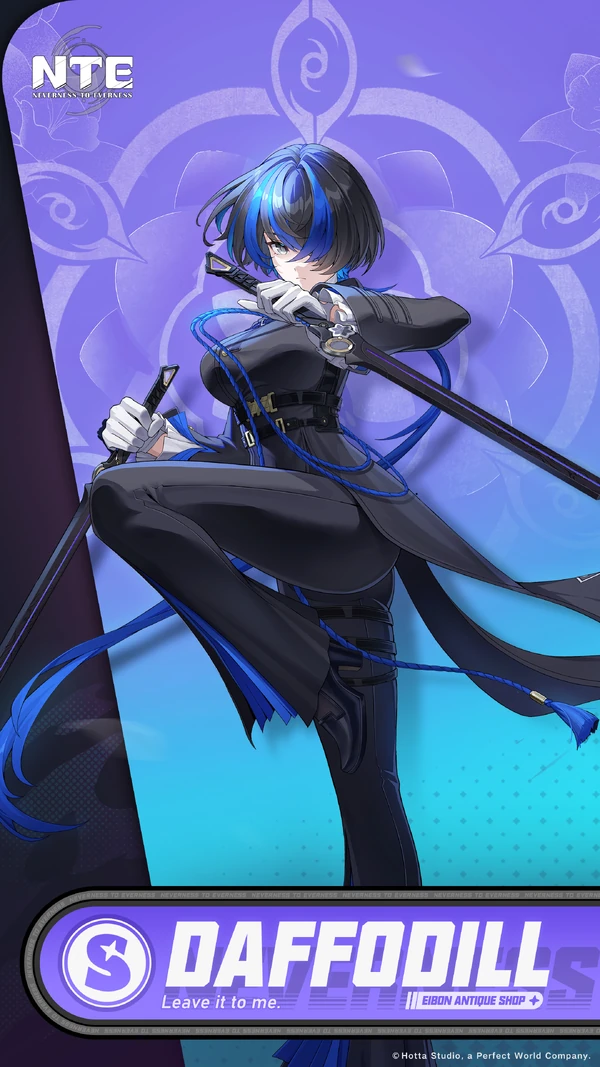
- Chaos: Lacrimosa, Daffodill
- Psyche: Blackbird, Fadia, Aurelia, Haniel
- Lakshana: Akane Rin, Chaos, Hathor, Skia
Main-Story Bosses (7)
The story version is fought once with a fixed team, but most can be re-fought elsewhere: Film-MANISH through the Anomaly Commission “Brand Anniversary” and its High-Risk version; Arachne and Debt Collector through the Anomaly Pilgrimage; Taygedo, Imaginadough, and Tomato Devil in the Hunter’s Crucible event. We have found no re-fight source for Zankou or Picture Frame.
1. Picture Frame (Prologue I)
- Location: the Anomaly space where Alice’s Bakery is located
- Weakness: Anima
- Mechanic: a parry and stagger-break tutorial fight — high HP but simple moves, with obvious red-light attack telegraphs
- Recommendation: your team is limited at this stage, so Mint (your only Anima unit) leads the attack; make full use of Parry + Critical Riposte to trigger stagger-break
- Difficulty: beginner-friendly ⭐
2. Taygedo (Prologue II)
- Location: during the Prologue II story
- Weakness: Lakshana. Breaking its stagger is still the focus, and it drops items when broken
- Mechanic: once its stagger gauge hits zero it enters a downed state; it throws nearby objects at the field, and you can counter those objects and hurl them back at the boss for massive damage
- Recommendation: keep Hathor as the lead, with Nanally, Esper Zero, and Edgar to keep the Charge resonance loop going
3. Film-MANISH (Prologue II)
- Location: the basement of Film Orbit Studio in Prologue II (fixed team in the story). To fight it again, use the Anomaly Commission “Brand Anniversary” (inside the tunnel in Unheard Shores) or its High-Risk version
- Weakness: Cosmos; Cosmos + Anima triggers Blossom
- Moves:
- Flash Light (flashing needle stab): a white light flares → Critical Dodge, then you can land a long combo after dodging
- Red Circle Slam (double red-circle ground slam): parry the moment the two red circles converge and turn yellow
- Frontal Laser: slows you on hit; sidestep laterally to avoid it
- Tactics: melee for Break, with Parry + Critical Dodge to build your gauge
4. Imaginadough (Chapter 2, “Love that Begins with Lies”)
- Location: the Azure Vista camp in Unheard Shores
- Weakness: Chaos
- Mechanic: HP-threshold splitting — at around 70% HP it splits into 2, and when low it splits again into 3. All clones share the same health pool, so focusing fire on a single body is the most efficient
- Recommendation: Lacrimosa + Daffodill + Sakiri + Haniel, running the Discord resonance loop
5. The Never-Ending Arachne (Chapter 3, “Deal? Deal!” + Pilgrimage)
- Location: the Ebisu Auction House in New Helland District
- Weakness: Chaos
- Moves:
- Flower shockwave → jump or Critical Dodge to avoid it
- Laser attacks → reposition during the attack gaps
- Phase 2 dark room mechanic: you must stay inside the “light circle” or you get frozen in place
- The final slash can always be parried, and a successful counter staggers the boss
- Recommendation: a Daffodill team (Daffodill + Sakiri + Haniel + Fadia). The story fight uses a fixed team, so the recommended team only applies to the Pilgrimage version
- Rewards (weekly): Hunter EXP, Scarab Coins, Advanced Hunter’s Guide, Colorless Dye, Dress Sleeves of Vanity, Arcane Thread
6. Debt Collector (Chapter 4)
- Location: inside the Dolores Mansion Anomaly in the Miguel District. In Chapter 4 you fight it twice, with Zankou in between
- Weakness: Cosmos
- Mechanic: long wind-ups and wide-sweeping attacks; your characters are locked on first encounter (Nanally, Esper Zero, Daffodill), and the story fight uses a fixed team
- Tactics: every long-wind-up move can be dodged; all surrounding-type attacks can be parried — just time your Basic Attack to counter
- Pilgrimage version: see “Pilgrimage Bosses” below
7. Zankou (Chapter 4 — 1.0 Final Battle)
- Location: the Dolores Mansion Anomaly, in the same chapter as Debt Collector — it is not a separate unlock
- Background: a core member of the Crimson Letter crime organization and the final boss of the 1.0 main story. Since 1.3 he is also a pullable character (Incantation, T0)
- Weakness: Incantation
- Moves:
- Phase 1: slow heavy strikes and short combos that can be read; the raised-sword charge wave can be parried back
- Phase 2: summons 4 phantom clones that charge in sequence, each requiring only 1 Critical Riposte to destroy
- Recommendation: a Hexed team (Nanally + Sakiri + Adler + Mint) or a Discord team (Baicang + Daffodill + Sakiri + Fadia)
- Difficulty: hard ⭐⭐⭐
World Bosses (7) — ⭐ Key: First Clears Give Standard S-Rank Signature Weapons
A world boss’s S-rank Arc is given once on your first clear and does not drop again. Repeat kills drop character upgrade materials, and these are not single-character items (for example, 1.5’s Elyms also needs Tear of the Sea).
1. Serenetti
- Location: Unheard Shores - Serenetti Manor greenhouse
- Unlock: the side quest “Where Worlds Sprout, Fall Unfolds”
- Weakness: Incantation
- Mechanic: a fixed-position boss (it does not move) whose attacks cannot be parried — a pure dodge fight
- Below 50% HP it goes berserk: a flood of speech bubbles appears around it, with dense bullet patterns + AoE, and it heals itself
- Rewards: Hunter EXP, Scarab Coins, Confessional Flower Seed (character upgrade material), Arcane Thread; first clear gives Baicang’s S-rank signature Arc “Camellia Society”
2. Swallowtail
- Location: New Helland District - Floe Cinema (the cinema projection room)
- Unlock: the Anomaly commission “Let’s Go See a Movie”
- Weakness: Anima
- Mechanic: it stays airborne, so it’s recommended you use ranged attacks or a Parry to knock it down
- Recommendation: Jiuyuan (ranged Anima gunner) at the core; Nanally is the best burst for converting the Anima weakness
- Rewards: Hunter EXP, Colorful Ticket Stub (character upgrade material); first clear gives Jiuyuan’s S-rank signature Arc “Reality Shelter”
3. Black Tome
- Location: New Helland District - Kyllene Trail (phone booth)
- Unlock: the Anomaly commission “The Book of Post-Adolescence”
- Weakness: Chaos
- Mechanic: chain attacks briefly root you in place, so dodging is key
- Red circle telegraph: timing a Parry on your Basic Attack stuns the boss
- Phase 2 below 50% HP: gushing chains + falling-door binds
- Rewards: Coal Lump’s Gift (containing A Page from Delusion’s Shore, a character upgrade material); first clear gives Daffodill’s S-rank signature Arc “Youthful Fantasy”
4. Headless Rider
- Location: Unheard Shores - Z42 Highway
- Unlock: the Anomaly commission “Ride Assault”
- Strict conditions: it only triggers at night (not in daytime; testers have confirmed 8:10 PM, 8:15 PM, 00:00, and 02:00), so setting the clock to 00:00 is the simplest route. You also must drive a four-wheeled car (no walking / motorcycle)
- Weakness: Psyche
- Moves:
- Tire Crush: always the second hit of a combo; when you see the red light, counter the third hit
- Aerial Charge: high mobility + tracking
- Clone Charge (below 50% HP): clones charge in succession and leave behind explosion points
- Rewards: Hunter EXP, Charging Knight Spark Plug (character upgrade material); first clear gives the S-rank Arc “Raging Flames” (the blue-flame motorcycle cosmetic)
5. Beat King
- Location: the park near Fiscus Boulevard in Illusion Town
- Unlock: the Anomaly commission “Rhythm Master”
- Weakness: Psyche
- Core mechanic: a rhythm-game beat battle — hitting the prompts in time with the Notes deals burst damage
- Two rhythm patterns appear mid-fight, which you need to learn
- Below 50% HP, a Parry can counter the flying-disc charge, knocking down the boss to create a damage window
- Recommendation: Jiuyuan is the best — she can run Blossom for sustained damage and keep attacking even while the body is rooted
- Rewards: Annulith, Scarab Coins, U-00NE, Water Moon Pick (character upgrade material), Magic Thread; first clear gives Haniel’s S-rank signature Arc “Blow Up the Crowd”
6. Sea Prisoner
- Location: New Helland District waters / Nautili Tunnel area
- Unlock: the Anomaly commission “Deep Blue Sorrow” (requires a four-wheeled car to pass through Nautili Tunnel)
- Weakness: Anima
- Moves:
- Phase 1: diving waves, geysers, tracking projectiles
- Phase 2: iron anchors, tsunamis, water-zone traps
- Charge attacks can be parried to trigger a stun
- Rewards: Tear of the Sea (character upgrade material), Magic Thread, Scarab Coins; first clear gives Aurelia’s S-rank signature Arc “Song of the Whale”
7. Nestbound Bird
- Location: New Helland District - Pink Paws Bank
- Unlock: the Anomaly commission “Call of the Lost”
- Weakness: Cosmos
- Mechanic: extremely high melee damage that can one-shot you, requiring precise Critical Dodge + Parry
- After you cut about 30% of its HP, Hotori intervenes in a story cutscene, and the boss enters a long vulnerable window → go all-out
- Rewards: Nest Guard Fragment (character upgrade material); first clear gives Skia’s S-rank signature Arc “Tears Behind the Mask”
Pilgrimage Bosses (Weekly) — Anomaly Pilgrimage
Reset Mondays at 05:00 (server time), with a per-account cap of 3 claims per week, mainly producing Esper Ability upgrade materials. There are 3 right now: Arachne (unlocks after main-story Chapter 3), Morphix (unlocks after the spinoff “Moonlight Pawnbroker”), and Debt Collector (added in 1.1). From 1.5 (Taiwan and global servers, 11/11) a 4th arrives, the Amber Broodmother; it drops new materials shared by Elyms and Exe, and you probably need to clear Chapter 6 first.
1. Morphix
- Location: Bridge Crossings - Green Wall Slope
- Unlock: the special story “Moonlight Pawnbroker”
- Weakness: Cosmos
- Moves:
- Melee combos: claw grabs, tail strikes, AoE explosions
- Ranged frisbee: has a red-light telegraph but cannot be rail-countered — you can only dodge
- Below 50% HP: adds bite and pounce combos
- Tactics: stay close to avoid its strong ranged attacks
- Rewards: Good Boy Stamp (Esper Ability upgrade material), Arcane Thread; first clear gives Sakiri’s S-rank signature Arc “Good Doggo Goes Far”
2. The Never-Ending Arachne (same as the main-story boss)
See main-story boss #5 above. The Pilgrimage version drops Dress Sleeves of Vanity (Esper Ability upgrade material); Fadia’s S-rank signature Arc “Eternal Waltz” is given once on your first clear.
3. Debt Collector (added in 1.1)
- Location: the cherry tree in the northeast of the Miguel District. It unlocks once you start Chapter 5, “Dreamwalk Corridor,” and watch the opening
- Weakness: Cosmos
- Mechanic: below 40% HP it unlocks its giant-sword ultimate
- Recommendation: Esper Zero + Hotori + Nanally + Jiuyuan
- Rewards: Eternal Memory
Hidden Bosses (2) — High Difficulty, High Reward
1. Hethereau Guardian / Justice Executioner ⭐⭐⭐
- Trigger: reach a 4-star Wanted level — you must accumulate enough wrongdoing as the “Appraiser” (beating up pedestrians, failed car thefts, attacking law enforcement, etc.)
- Level: fixed Lv 99 (ignores your Appraiser level)
- Weakness: Psyche
- Moves: arm sweeps, rapid lunges, spinning slashes, lamppost ground slams, and a tracking laser beam (lethal at range)
- Recommendation:
- Suggested team: Nanally + Jiuyuan + Esper Zero + Hotori, or build around your strongest Main DPS
- Stain team: Hathor + a Lakshana/Psyche pairing
- Post-victory flow: turn yourself in at the police station to claim the reward; lose and you go to jail
- Rewards: the S-rank Arc “Hethereau Guardian”
- ATK +15%
- Boss DMG +15%
- Can summon Officer Whisker as a combat assist
- A Solid-type Arc, so only Solid characters get full use of it: Jiuyuan, Esper Zero, Haniel, Hotori, and Elyms (from 1.5, 11/11)
2. Mammon ⭐⭐
- Location: the Realm of Greed — entered through the “Blind Mammon cushion” inside your home
- Unlock: complete the Anomaly commission “Yarn Ball or Fons” and buy the Gluttonous Eye at the Ebisu Auction House
- Weakness: Lakshana. In the commission “Yarn Ball or Fons?” Mammon has no weakness; everywhere else it is Lakshana
- Recommendation: Chaos + Hathor + Esper Zero + Iroi
- Core mechanics:
- Timed challenge: there is a timer at the top, and Ultimate animations pause it. You still earn Fons if you do not kill it: the payout depends on Mammon’s remaining HP, you can retry without limit, a new record pays the difference, and there is a weekly cap
- High mobility + fast combos
- Array Slam: a delayed AoE after a punch — be especially careful
- The tail end of its combos can be parried
- Rewards: Fons, roughly 25,000 to 75,000 per week depending on level, with rewards resetting every Monday and the amount scaling with your cushion level. It is a handy weekly task, not your main Fons source. The High-Risk version can be fought too
Other Bosses (Added by Version)
These bosses do not have their own sections yet, so here are the known highlights. Some Traditional Chinese names are still unconfirmed, so English or Japanese names are kept.
- Tomato Devil: Chaos weakness, and it counters parries. It appears in spinoff content and events. Source team: Lacrimosa + Daffodill + Sakiri + Haniel
- Teehee Bear: Incantation weakness. A 1.1 Sunny Isle main-story boss, and also the High-Risk commission “Mist Pursuit” (Lv 39 and up, unlocked after clearing Dreamwalk Corridor)
- Tornado: in the detention center, unlocked by finishing the quest A Breeze Through the Cage. Characters and level are fixed, there is no weakness, and you should block. You can challenge it without limit at three tiers, Lv 55 / 60 / 80, giving Strong Painkiller ×2 / ×3 / ×5
- High-Risk exclusives: Cursed Blade (Where Is Home, no weakness), Bopp (Supersonic Graffiti, Psyche), Cardboard Castle (An Offer Hard to Refuse, Lakshana, stationary), Skyfish Banner (no weakness, 3 against 1)
- Night of 999 (from 1.2): Fixed team, no weakness. Bosses include the Crimson Dragon, plus one hidden boss (details unconfirmed)
- 1.4 Pukaland haunted house “Ghost Run” final boss: a first-person flashlight fight with about 14 flashes
The Element Cycle and Resonance Reactions (Must-Know for Bosses)
The 6-Element Cycle
Cosmos → Anima → Incantation → Chaos → Psyche → Lakshana → back to Cosmos
The 8 Resonance Reactions
| Reaction | Element Combo | Effect / Signature Team |
|---|---|---|
| Blossom | Cosmos + Anima | Steady DPS trigger, Jiuyuan’s signature |
| Hexed | Anima + Incantation | Nanally + Sakiri synergy |
| Scorch | Incantation + Chaos | DOT damage over time |
| Nova | Chaos + Psyche | Marks the target, then detonates for a big hit; see the reactions guide |
| Stain | Psyche + Lakshana | Hathor’s mainstay |
| Remora | Lakshana + Cosmos | Slows the target |
| Charge | Cosmos + Anima + Lakshana | The Nanally team, restores energy for the on-field character |
| Discord | Incantation + Chaos + Psyche | The core of the Daffodill team, removes part of the Break Gauge |
Key to fighting bosses: build your team with the weakness element + adjacent elements on the cycle to amplify damage + break stagger + trigger the Ultimate loop all at once.
World Boss Re-fight Mechanics
| Item | Anomaly Hunt (World Boss) | Anomaly Pilgrimage (Weekly Boss) |
|---|---|---|
| Co-op multiplayer | ✅ | ✅ |
| Respawn / reset | no respawn timer; fast-travel after first clear, unlimited re-fights | challenge anytime, rewards reset Mondays at 05:00 |
| Attempt limit | none | 3 claims per account per week |
| Resource cost | 60 Character Pixels per run | Character Pixels |
| Material drop amount | scales with Appraisal Level (Level 2 drops 5, Levels 4 to 6 drop 7) | no rewards after 3 claims |
The Monday 05:00 server reset simultaneously refreshes: City Stamina, Anomaly Pilgrimage attempt count, Ebisu Auction, and the Realm of Greed.
Beginner Boss-Challenge Priority
Ordered by “reward value + difficulty gradient”:
- Nestbound Bird (Skia’s signature weapon “Tears Behind the Mask”) — easier, just bring a Cosmos character
- Headless Rider (S-rank Arc “Raging Flames,” blue-flame cosmetic) — mind the night-time condition (set the clock to 00:00) and the four-wheeled-car condition
- Swallowtail (Jiuyuan’s signature weapon “Reality Shelter”) — airborne, needs ranged attacks
- Serenetti (Baicang’s signature weapon “Camellia Society”) — pure dodge fight
- Black Tome (Daffodill’s signature weapon “Youthful Fantasy”) — chain roots, be cautious
- The Never-Ending Arachne (Fadia’s signature weapon “Eternal Waltz”) — hard, Phase 2 needs a strong team
- Hethereau Guardian (Solid-type S-rank Arc) — the final challenge, high-difficulty Lv 99
Individual Boss Deep-Dive Guides
For a single boss’s full strategy, elemental weakness, parry timing, and signature-weapon drop, see the individual deep-dive guides:
- Serenetti — Baicang’s Camellia Society weapon, Silent Garden high difficulty
- Mammon / Realm of Greed — the 90-second weekly Fons farm, Lakshana team
- Headless Rider / Ride Assault — Hathor’s blue-flame motorcycle Arc, Psyche element
- Beat King / Sonic Tyrant — Haniel detonating the whole field, rhythm beat battle
- Nestbound Bird — Skia’s Tears Behind the Mask, Cosmos element
- Black Tome — Daffodill’s Youthful Fantasy, Chaos weakness
- The Never-Ending Arachne — Fadia’s Eternal Waltz, Chaos weakness
- Swallowtail / Let’s Go See a Movie — Jiuyuan’s Reality Shelter, Anima element
- Morphix — Sakiri’s Good Doggo Goes Far, Cosmos element
- Sea Prisoner / Deep Blue Sorrow — Aurelia’s Whale Song, Anima element
- Debt Collector + Zankou (1.0 main-story finale) — the finale dual bosses, Cosmos / Incantation weaknesses
Related Guides
- Esper Ring Reactions — a detailed breakdown of the 6-element reaction mechanics
- Complete Arc System Guide — which bosses drop which Arcs
- Complete Signature Weapon (Signature Arc) Guide — which character’s signature weapon each boss corresponds to
- Side Quest Guide — the prerequisite quests that trigger bosses
- City Tycoon Guide — Mammon + the Pink Paws heist
FAQ
How are NTE bosses categorized? +
4 main categories: (1) 7 main-story bosses (Prologue – Chapter 4; the story version is fought once, but most can be re-fought elsewhere through Anomaly Commissions, the Pilgrimage, or events); (2) 7 world bosses (Anomaly Hunt — after your first clear you can fast-travel to them from the map and re-fight without limit); (3) Anomaly Pilgrimage bosses (currently 3: Morphix, Arachne, and Debt Collector; reset Mondays at 05:00, with a per-account cap of 3 reward claims per week; a 4th arrives with 1.5); (4) 2 hidden bosses (the Hethereau Guardian / Justice Executioner summoned at 4-star Wanted level, and Mammon's Pink Paws heist). There are also Tomato Devil, High-Risk exclusives, and event bosses — see "Other Bosses" below. The roster grows with each version, so check in-game.
How do I pick elements when fighting a boss? +
Build your team around the boss's weakness element + the adjacent elements on the cycle so you simultaneously amplify damage, break stagger, and trigger your Ultimate loop. Example: against a boss weak to Cosmos (Light) (Film-MANISH, Debt Collector, Morphix, Nestbound Bird), the top pick is a Cosmos Main DPS paired with Anima (to trigger the Blossom reaction). Element cycle order: Cosmos → Anima → Incantation → Chaos → Psyche → Lakshana → back to Cosmos.
Which world bosses are most worth fighting? +
Nine bosses give an S-rank Arc outright on your first clear. World bosses (7): (1) Serenetti — Baicang's signature weapon "Camellia Society"; (2) Swallowtail — Jiuyuan's "Reality Shelter"; (3) Black Tome — Daffodill's "Youthful Fantasy"; (4) Headless Rider — the S-rank Arc "Raging Flames" (the blue-flame motorcycle cosmetic); (5) Nestbound Bird — Skia's "Tears Behind the Mask"; (6) Beat King — Haniel's "Blow Up the Crowd"; (7) Sea Prisoner — Aurelia's "Song of the Whale." Pilgrimage (2): Morphix — Sakiri's "Good Doggo Goes Far"; The Never-Ending Arachne — Fadia's "Eternal Waltz." The S-rank Arc is a one-time first-clear reward; repeat kills drop character upgrade materials instead.
How do you trigger the Hethereau Guardian? +
You need to build up a 4-star Wanted level (accumulate enough wrongdoing as the "Appraiser" — beating up pedestrians, failed car thefts, attacking law enforcement) → the system auto-summons the Justice Executioner. It is a fixed Lv 99, weak to Psyche. After winning, you must turn yourself in at the police station to claim the reward; lose and you go to jail. The reward is the S-rank Arc "Hethereau Guardian" (ATK +15% + Boss DMG +15% + summons Officer Whisker as a combat assist). It is a Solid-type Arc, so only Solid characters get full use of it: Jiuyuan, Esper Zero, Haniel, Hotori, and Elyms (from 1.5, 11/11). It is not universal.
What is Mammon? +
Mammon is the boss of the "Realm of Greed" and a handy weekly Fons source — roughly 25,000 to 75,000 Fons per week depending on level, so it is not your main Fons income. You enter it through the "Blind Mammon cushion" inside your home. Weak to Lakshana. You still earn Fons if you do not kill it: the payout depends on Mammon's remaining HP, you can retry without limit, a new record pays the difference, and there is a weekly cap. Ultimate animations pause the timer. Rewards reset every Monday, scale with your cushion level, and the High-Risk version can be fought too. For a detailed money-making route, see the City Tycoon Guide.
Boss bestiary data is compiled from public sources including Game8, GameWith, ZeroLuck, AllThings.How, Mobalytics, SixStoreys, Bahamut, Entertainment Taxi, 4Gamers, and others. Specific boss HP values and move cooldowns are not included, as they are unpublished in-game; new bosses from later versions will be added once they go live. Defer to in-game for actual details.
Was this page helpful?
Related articles

Serenetti Complete Boss Guide: Baicang Signature Camellia Society Drop, Pure Dodge Fight, Silent Garden Tier 6 Affixes

The Never-Ending Arachne Complete Guide: Eternal Waltz Arc, Chaos Weakness, Dark Room Light Circle Mechanic, Discord Team